

how to install dash cam
Dash Cam Installation Guide

Because dash cams require a constant supply of power to use and operate, a proper installation will greatly benefit your dash cam experience. In this guide, we'll go over one of two methods. This method involves little to no tools and is the simplest method to learn. The second method involves hardwiring your dash cam with a hardwire kit. This process is much more technical and is only recommended if you are well versed in electrical systems and how automobile fuses work.
Hopefully by the end of this guide, you will have set-up your dash cam to be as wire-free as possible. Let's get started!
Getting Started
This method should take no longer than 15 minutes to complete and requires little-to-no tools. In most cases, everything you need should already come with your dash cam. If not, here is what you need: power cable 10 ft or longer, a USB outlet in your vehicle or a USB car charger, and an optional trim tool. The purpose of this method is to install your dash cam as "wire-free" as possible, while maintaining a wireless look so that the cables are hidden and not obstructing the view of the driver.
NOTE: If you intend to utilize the Parking Mode feature on your dash cam, refer to our Hardwiring Your Dash Cam Guide .
Checklist of What I Need to Get Started
-
Dash Cam
-
Power Cable
-
USB Car Charger
-
Trim Tool (Optional)
Locate a Power Source
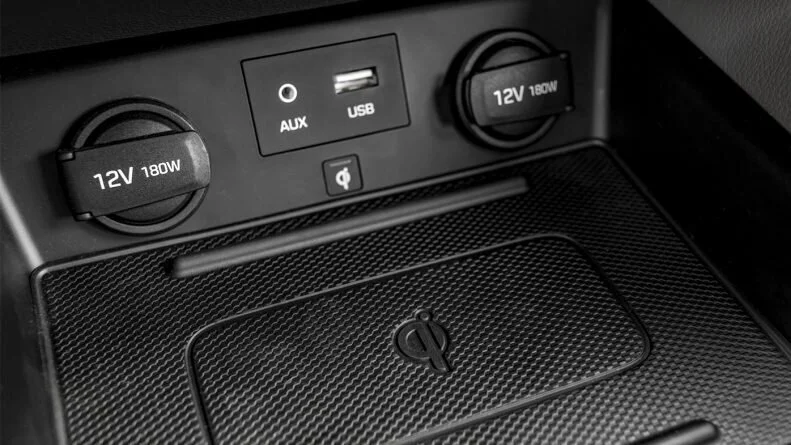
Before you start, make note of where your USB outlet or cigarette lighter socket is. In most vehicles, the location of a USB charging port can be found inside the arm-rest compartment, on the center console of your vehicle, inside the glove-box compartment or on either side of the driver or passenger.
NOTE: If you plan to utilize your car's USB charging outlet, please make sure that the cigarette socket turns off with your vehicle and does not maintain power when your vehicle is completely turned off. A constant hot cigarette socket may eventually drain your vehicle's battery.
If you are unable to locate a power source, we recommend referring to your vehicle's user manual. If your power source is located elsewhere, you can still follow this guide and adjust accordingly to where your power source is located. If you continue to have issues locating a power source, your only other option may only be to hardwire your dash cam with a hardwire kit.
Installing & Mounting the Front Dash Cam
In most vehicles, you will find A, B, C and D pillars. In essence, the longer the car, the more pillars they should have. These pillars refer to the vertical or near vertical supports of a car's window area. We'll use the pillars to help guide your power cables through the frame of your car. By doing so, we'll be able to conceal your power cable and help you seamlessly integrate your dash cam with your vehicle. A trim tool may come in handy.
Front Dash Cam Installation Instructions

-
To start, locate an ideal placement for your dash cam on the windshield of your car. It is usually recommend that you place your dash cam behind the rear-view mirror at the center of your windshield. This is an ideal location because it hides your dash cam and avoids any kind of obstruction to the driver's view.
-
Locate a power source. If your vehicle is equipped with a USB charging port, you may use the USB charging port to plug in your USB power cable. If you do not have a USB charging port, use a USB car charger and plug it into a cigarette socket.
NOTE: If your USB charging port or cigarette lighter socket provides constant power when your vehicle is turned off, you may need to hardwire your dash cam to avoid battery drain.
-
As illustrated, route your power cable inside the headliner of your car in the direction of your power source. Continue through the headliner in the direction of the A pillar. Once you reach the A pillar, route the power cable down through the A pillar by hiding and placing the power cable inside the weather strip. Using a trim tool can help you tuck the necessary wires inside your headliner and A Pillar.
NOTE: If your power cable is loose and does not hold inside the headliner, you can use cable clips to hold your power cable in place.
-
Continue routing the power cable down and through the underside of the dashboard, hiding the power cable inside nooks and crannies. Plug your power cable into the power source to finish.
NOTE: Consult with local state laws in your area before installing your dash cam. Certain restrictions and limitations may apply to the placement of objects on the windshield of your vehicle. In general, placing a dash cam behind the rear view mirror away from the driver's view is considered reasonable and safe. View our Are Dash Cams Legal? to learn about certain restrictions and limitations that may apply to where you live.
Installing & Mounting the Rear Dash Cam
If your dash cam does not come with a rear camera, skip this step. For users who have a rear dash cam, the same installation concept as the front dash cam can be applied. Because the rear dash cam needs to be connected to the front dash cam, a longer cable is typically required.
Rear Dash Cam Installation Instructions
-
Place the rear camera at the top center of your rear windshield. The location of this placement is ideal as it covers the maximum amount of view from left to right.
-
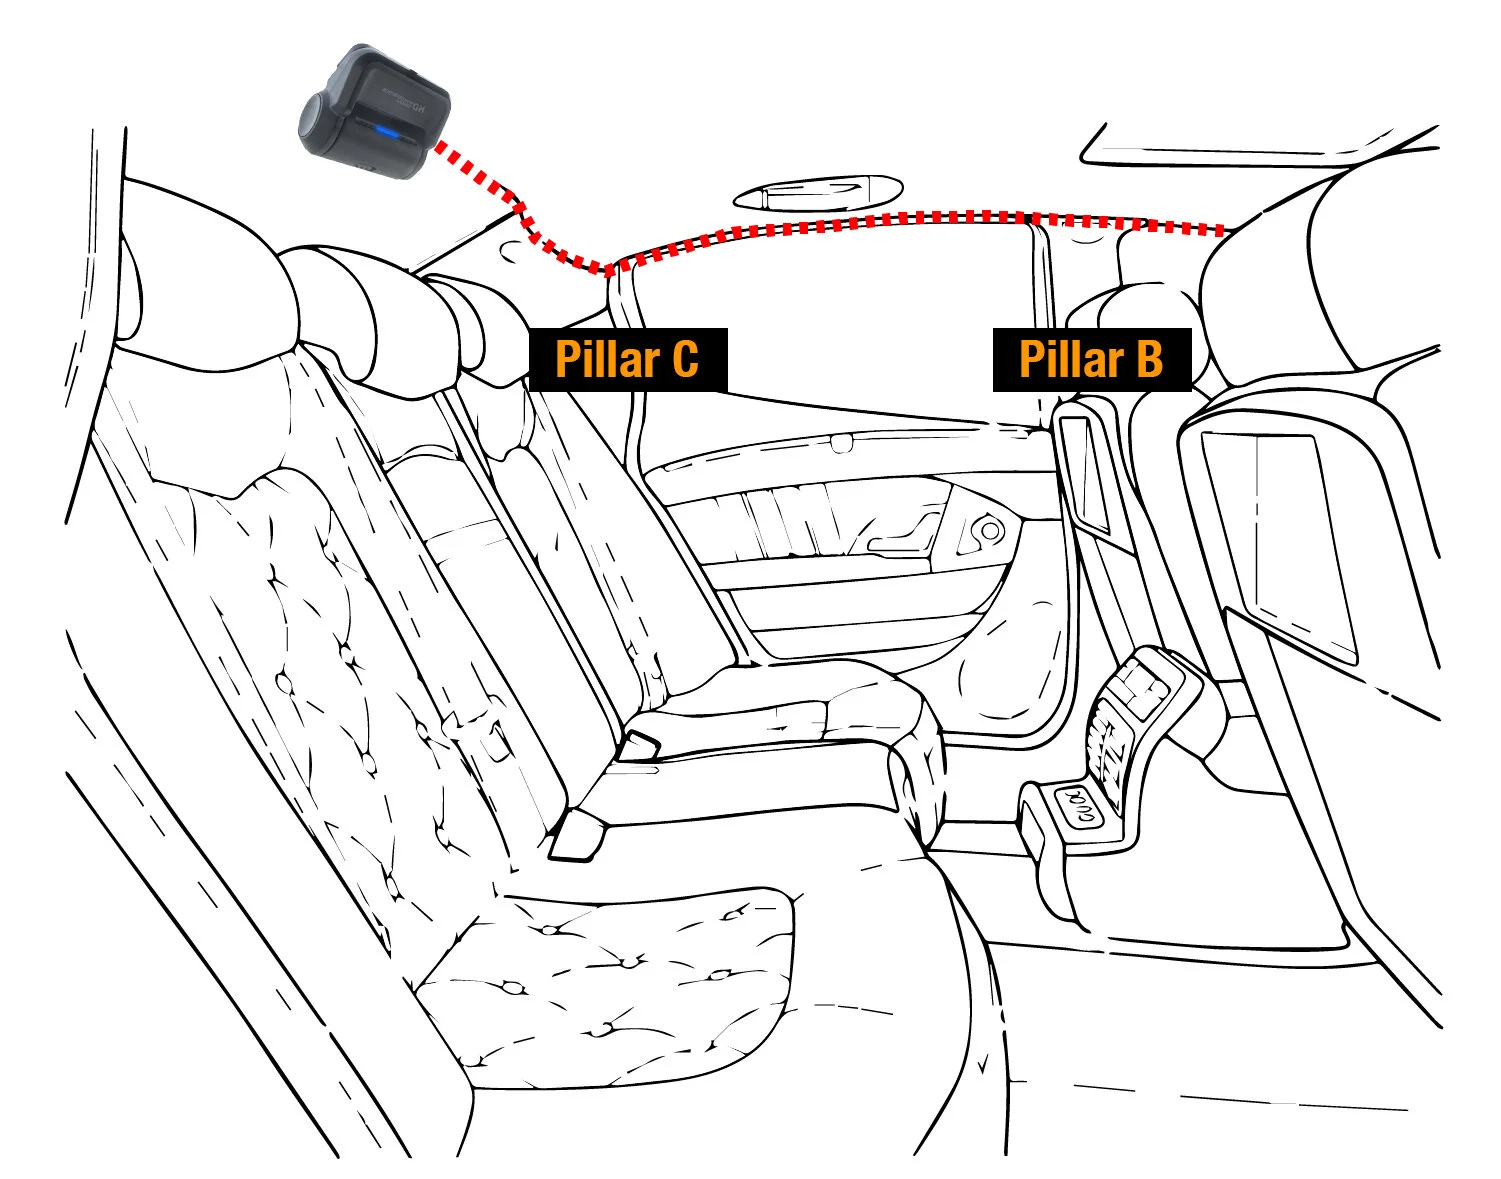
As illustrated in the image, route the rear camera cable inside the headliner of your rear windshield. Make sure to route your rear camera cable in the opposite direction of your front dash cam's power cable to avoid overlapping.
NOTE: If your power cable is loose and does not hold inside the headliner, you can use cable clips to hold your power cable in place.
-
Continue routing the rear camera cable through by placing the rear camera cable inside the weather strip. Route the rear camera cable through the C, B and A pillar.
NOTE: Your vehicle may differ depending on the length of your car. Additional wiring may be needed if your vehicle has a Pillar D.
-
Once you've reached the A Pillar, proceed to route the rear camera cable through the front windshield's headliner until you reach the front dash cam. Plug your rear camera cable into the front dash cam to finish the installation.

Test Your Installation
Once you've completed installing your front and rear dash cam, try turning on your vehicle to make sure your dash cam turns on. If everything is installed correctly, your dash cam should turn on and automatically start recording.
Run a quick check to see if there are any cables visible. If you have properly installed your dash cam, your cables should be hidden and not be visible.
If you continue to have issues with the installation process, please feel free to reach out to one of your customer support representatives. We'll be happy to help guide you through the entire dash cam installation process.
FAQs
Do I need a Hardwire Kit to Use Parking Mode?
A hardwire kit is a device that connects your dash cam to your vehicle's fuse box. By doing so, your dash cam will be supplied with constant power, even when your car is turned off and parked. Because the Parking Mode feature requires a constant supply of power, it is required that you install your dash cam with a hardwire kit or use an external battery. For users who are not using the Parking Mode feature, a hardwire kit is not required.
What If I Have More Wires than I Need?
Often times you will find yourself with more cables than you need to use. If that is the case, simply tuck in excess wires into the nooks and crannies of your car. Should you not be able to locate areas to hide and tuck your cables, consider purchasing a shorter power cable.
Will I Risk Damaging My Car?
No, as long as you follow our tips and guides, you should not run into any issues. The dash cam installation guide provided on this page is safe for anyone to do.
My Cables Are Loose And Won't Stay Inside My Headliner
If after running your cable through the headliner of your vehicle and your cables don't stay in place, consider using cable clips. Cable clips can adhere to the windshield of your car and hold your cables in place. Simply place the wire clips a couple inches apart alongside the headliner. Once the clips are in place, clip your cable inside the cable clip to attach.
Questions or Comments?
Should you require additional information or if you have any questions, please do not hesitate to contact us. A member of our team will respond to you within 24 hours. Or comment below and let us know if you found this article helpful.
how to install dash cam
Source: https://www.grdian.com/resources/dash-cam-installation-guide
Posted by: lukerturitch.blogspot.com
0 Response to "how to install dash cam"
Post a Comment